
A weak charging system can leave you with a dead battery, dim lights, warning lamps, or a car that quits after a jump-start. The hard part is that a bad battery, loose cable, blown fuse, slipping belt, or wiring fault can look almost identical to a failed alternator.
The fastest clue is voltage behavior before and after the engine starts. A healthy charging system should change the battery’s voltage in a controlled way, but one reading alone is not enough to condemn the alternator.
This guide shows how to check an alternator with a digital multimeter, load the charging system, test voltage drop, check AC ripple, and decide when the fault is elsewhere.

How to Check an Alternator: 7 Tests That Prevent Guesswork
Start with the battery and basic mechanical checks, then test the alternator under real electrical load. The goal is not to chase one “magic” voltage number. Compare engine-off voltage, running voltage, loaded voltage, wiring loss, and AC ripple so each result confirms or challenges the last.
| Check | Meter setup | Useful result | What an abnormal result suggests |
|---|---|---|---|
| Battery at rest | DC volts | About 12.6 V when fully charged | Discharged or weak battery |
| Engine running | DC volts | Often 13.0 to 14.5 V on conventional systems | Undercharge, overcharge, wiring, regulator, or alternator issue |
| Loaded at about 2,000 RPM | DC volts | Voltage stays within vehicle specification | Weak output, belt slip, cable resistance, or control issue |
| Positive cable drop | DC volts | About 0.2 V or less | Resistance between alternator and battery |
| Ground-side drop | DC volts | About 0.2 V or less | Poor engine, alternator, or battery ground |
| AC ripple | AC volts, low range | Very low ripple; meter and vehicle specs matter | Possible diode or stator fault |
Inspect the Belt and Connections
Turn off the engine, set the parking brake, and locate the battery, alternator, serpentine belt, and major charging cables.
Look for a loose, glazed, cracked, or contaminated belt. Check battery terminals for corrosion or looseness. Inspect visible alternator wiring for damaged insulation, loose connectors, or overheated terminals. Check battery condition, belt condition, and charging-system cables before judging alternator output.
Keep hands, clothing, jewelry, and test leads away from the belt with the engine running. Never let a probe bridge the alternator output terminal to ground. If the B+ terminal is difficult to reach safely, perform basic measurements at the battery first.
Check Battery Voltage First
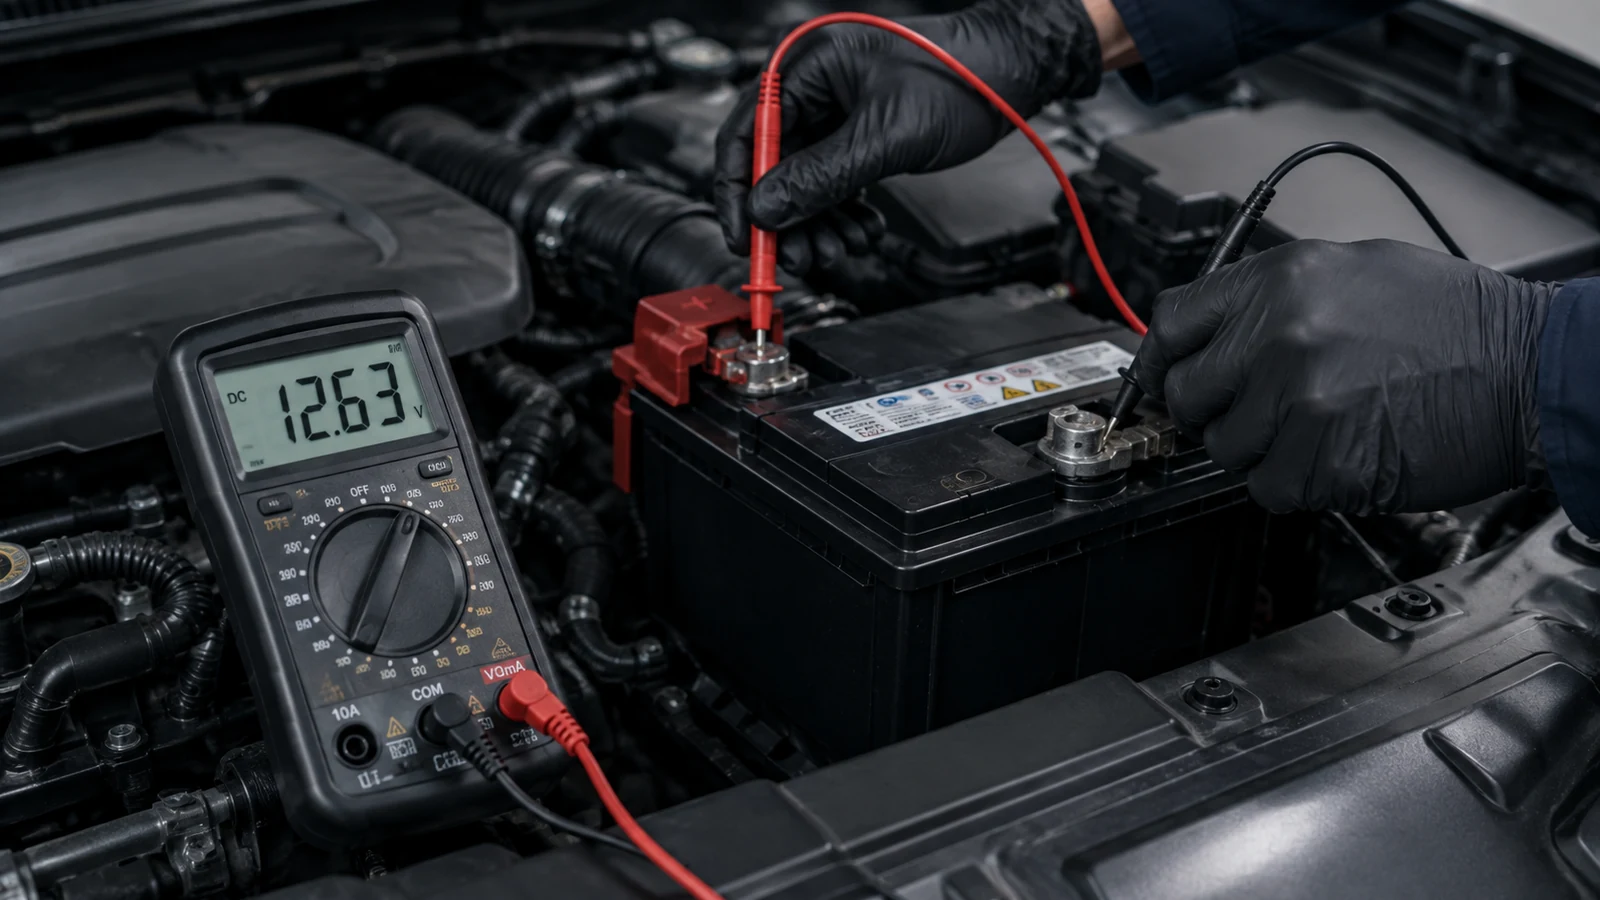
Set a digital multimeter to DC volts. On a manual-ranging meter, choose a range that covers at least 15 volts, commonly the 20 V DC range. Touch the red probe to the positive battery post and the black probe to the negative post.
A fully charged 12 V battery commonly reads about 12.6 V at rest. Around 12.4 V indicates a lower state of charge, and a substantially discharged battery should be charged and tested before you rely on alternator results.
If the battery is badly discharged, stop here. A low state of charge can make charging-system diagnosis confusing. If the vehicle will not crank, follow a structured no-start diagnostic path before assuming the alternator caused the problem.
Measure Charging Voltage at Idle
Leave the meter connected to the battery posts. Start the engine and let it settle at idle with headlights, blower, rear defogger, seat heaters, and other major accessories turned off.
The voltage should normally rise above the resting battery reading. DENSO gives 13.0 to 14.5 V as a general engine-running range, while Fluke lists 13.7 to 14.7 V under normal conditions. These are useful screening ranges, not universal pass-fail limits.
Modern vehicles may use computer-controlled charging. System voltage can change with battery state, temperature, electrical demand, and charging strategy. If the reading looks unusual, compare it with the factory specification before replacing parts.

Add a Real Electrical Load
A weak alternator can look acceptable at idle with almost nothing switched on. Turn on the headlights, blower motor, and rear defogger, then watch the meter. Follow the vehicle’s specified test speed when available.
DENSO’s charging-system procedure uses roughly 2,000 RPM with electrical loads applied and gives a general 13 to 15 V range while directing technicians to the vehicle service manual for exact specifications.
What matters is stability. If voltage falls toward battery-only voltage and keeps dropping as loads are added, the charging system is not keeping up.
That still does not prove the alternator itself is defective. Belt slip, cable resistance, a poor ground, a blown charging fuse, or a control-circuit fault can produce a similar result.
Check the Charging Circuit for Loss
If alternator output appears low, test the wiring before buying an alternator. A voltage-drop test shows how much voltage is being lost across cables and connections while current flows.
For the positive side, place one probe on the alternator B+ output stud and the other on the battery positive post. Run the engine at the specified test speed with major electrical loads operating. A common target is 0.2 V or less. DENSO gives the same guideline for the positive and negative sides of the charging circuit.
For the ground side, measure between the alternator case and battery negative post under load. Excessive drop points toward resistance in grounds, cable ends, mounting points, or connections. Voltage-drop testing can reveal restrictions that visual inspection misses.
If the wiring path is unclear, follow the correct factory connector-view steps to identify the right terminal face, cavity, and circuit before probing.
Check Fuses and the Charge Circuit
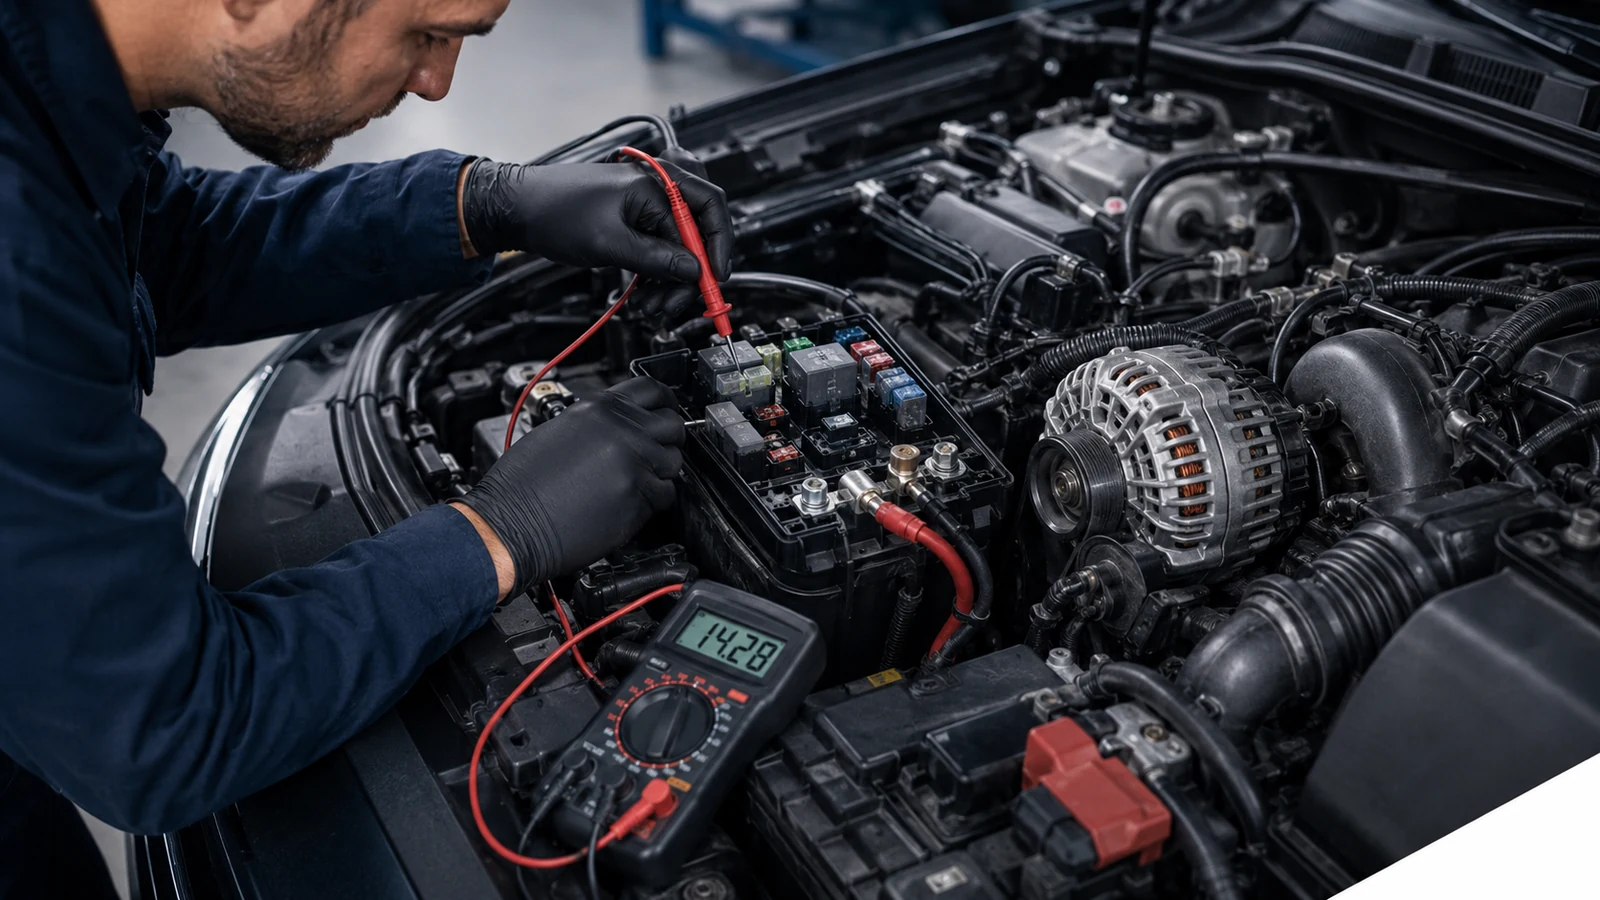
Many charging systems include a high-amperage fuse, fusible link, battery-current sensor, alternator control wire, or module-controlled field circuit. A functioning alternator cannot charge through an open power path.
If battery voltage does not rise but the belt is driving the alternator, inspect charging-system fuses and links according to the vehicle diagram. DENSO specifically includes open-fuse checks in charging-system diagnosis.
Do not rely only on a visual fuse inspection. Follow the correct procedure for testing power on each side of the circuit. If several electrical systems are also failing, investigate possible fuse-box electrical problems before replacing the alternator.
Run an AC Ripple Test
An alternator generates AC internally, then rectifier diodes convert it to DC for the vehicle. A damaged diode or stator winding can leave excessive AC ripple on the charging voltage even when the DC reading looks reasonable.
Keep the engine running and switch the multimeter to a low AC-voltage range if the meter supports an appropriate automotive measurement. Measure across the battery posts. Electrical load from the headlights, blower, and rear defogger can make ripple faults easier to detect.
Fluke describes 0.05 V AC or less as desirable with its automotive meter setup and flags roughly 0.30 to 0.50 V AC or higher as a likely fault range. Meter design matters, so follow the meter manufacturer’s method and the vehicle specification before condemning the alternator.

Read the Results as a Pattern
A single low reading should start diagnosis, not end it. Use the results together:
- Low battery voltage before starting: Charge and test the battery first.
- Normal battery, little voltage rise running: Inspect the belt, fuses, control circuit, cables, and alternator.
- Good alternator-side voltage but low battery voltage: Suspect positive-cable resistance.
- High ground-side voltage drop: Repair the ground path before retesting.
- Voltage collapses only under load: Check alternator capacity, belt drive, wiring loss, and charging commands.
- High AC ripple: Suspect rectifier-diode or stator trouble and confirm with a proper charging-system or bench test.
This test-by-test approach mirrors how a good diagnostic flowchart prevents parts swapping. Each result should determine the next measurement.
Know When to Stop Testing
Stop if you cannot access the necessary test points without getting close to moving belts, hot exhaust parts, or an exposed B+ terminal. Also stop if the battery is swollen, leaking, frozen, or visibly damaged.
If your readings conflict, record battery voltage, running voltage, loaded voltage, positive drop, ground drop, and ripple. Compare those numbers with the OEM charging-system procedure for the exact year, engine, battery type, and alternator configuration.
A confirmed alternator failure should follow evidence, not symptoms alone. That is how you avoid replacing an expensive part when the real fault is a battery, fuse, cable, ground, belt, connector, or charging-control circuit.
Commonly Asked Questions About Checking an Alternator
Can an alternator be bad even if the car still starts?
Yes. Starting the engine mainly proves the battery and starter had enough energy for that crank cycle. It does not prove the alternator can recharge the battery or support electrical loads afterward.
A partially failing alternator may still produce some output, especially at higher engine speeds, but may fall short at idle or under heavy load. Check the battery voltage with the engine off, then compare it with the running voltage and loaded voltage.
Also watch for a battery warning light, dimming lamps, unstable electronics, or repeated low battery state of charge. If the charging voltage is weak, test wiring loss and belt drive before condemning the alternator.
How can I tell a bad battery from a bad alternator?
Test the battery first because a discharged or weak battery can distort charging-system results. After the battery has rested, about 12.6 V generally indicates a fully charged 12 V battery. If it is low, charge and test it before judging the alternator.
Then start the engine and look for a controlled rise in voltage. If the battery is healthy but the voltage doesn’t rise as expected, inspect the belt, charging fuse, wiring, grounds, and alternator control circuit.
If voltage is normal while running but the battery repeatedly goes flat after the vehicle sits, investigate battery condition and parasitic draw rather than assuming alternator failure.
What voltage should an alternator show at idle?
No single number fits every vehicle. On many conventional 12 V systems, a running reading in roughly the 13 to mid-14 V range is a useful sign that the alternator is charging. However, modern smart-charging systems may command lower or higher voltage at different moments based on battery temperature, state of charge, electrical load, and control strategy.
Compare the running reading with the engine-off battery voltage, then repeat the test with electrical loads switched on. If the number looks wrong or changes unexpectedly, use the factory specification for that exact vehicle. Don’t replace an alternator based on one generic voltage threshold alone.
Can a bad alternator pass a basic voltage test?
Yes. A basic no-load DC test can miss faults that appear only when the alternator must supply more current. An alternator with a weak diode, damaged stator winding, poor belt drive, or temperature-related fault may show acceptable voltage for a short time at idle.
Add headlights, blower, and rear defogger, then repeat the voltage test at the specified engine speed. Check positive- and ground-side voltage drop so cable resistance doesn’t masquerade as alternator failure.
An AC-ripple test can also expose diode or stator problems that a simple DC reading misses. If symptoms are intermittent, you may need a professional load or bench test to reproduce the failure.
Do I need to remove the alternator to test it?
Usually not for the first round of diagnosis. You can perform useful in-vehicle checks at the battery and charging circuit, including engine-off battery voltage, running voltage, loaded voltage, voltage drop, and AC ripple.
These tests often tell you if the problem is the alternator, its drive belt, wiring, grounds, fuse path, or charging-control system. Removal becomes useful when in-vehicle results point strongly to an internal fault, and you want a bench test, or when the manufacturer’s procedure requires direct component testing.
Before removing anything, confirm the battery is charged and the wiring path is sound. That prevents replacing a good alternator because of an external circuit problem.